
How to sell direct ads using Ezoic and increase your ePMV
As your website grows in terms of traffic and popularity, it can become a valuable asset for generating revenue.
One way to monetize your website is through advertising. One of the most popular ways to do this is through Adsense, a program offered by Google that allows you to place ads on your website and earn money for each click or impression.
However, as your website continues to grow, you may want to consider using a more advanced ad networks provider such as Ezoic, Mediavine, or Adthrive.
Ezoic, in particular, offers several advantages over other ad networks. For example, Ezoic provides more control over the ads displayed on your website, allowing you to optimize the ad experience for your users.
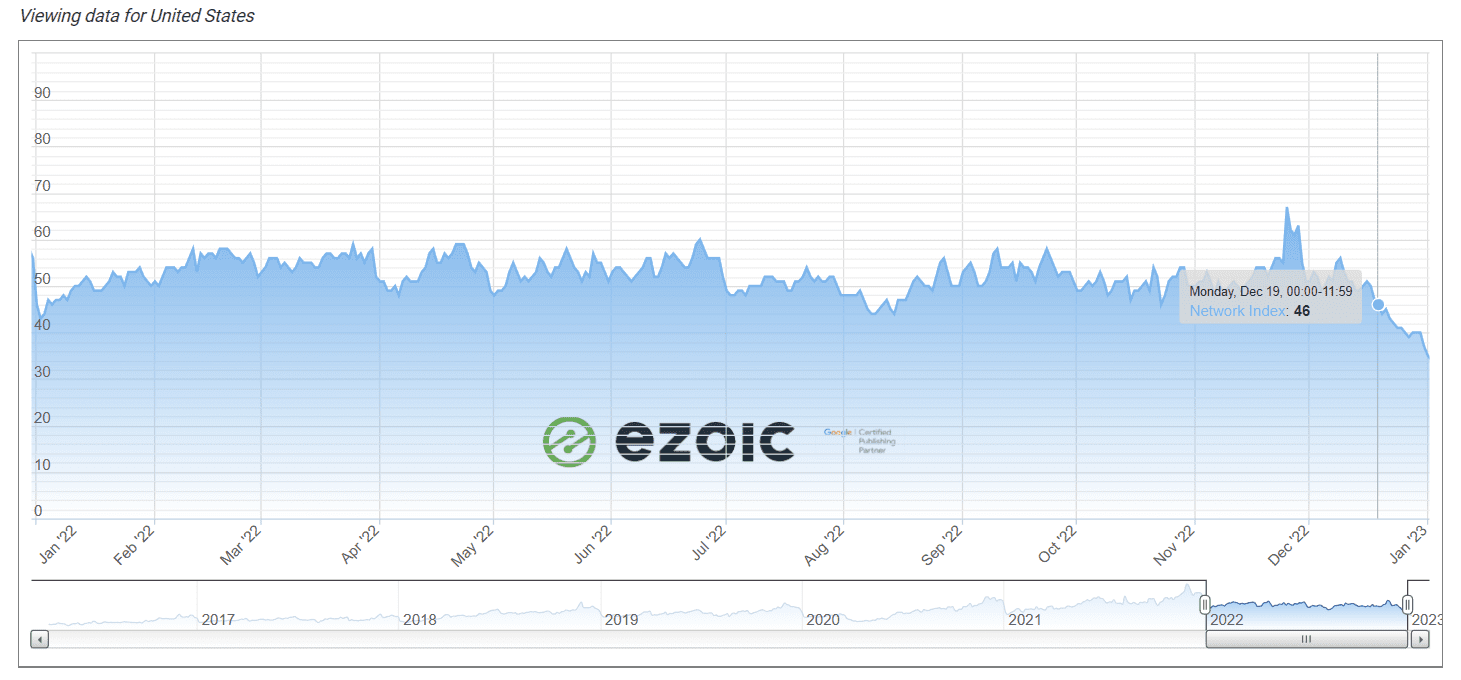
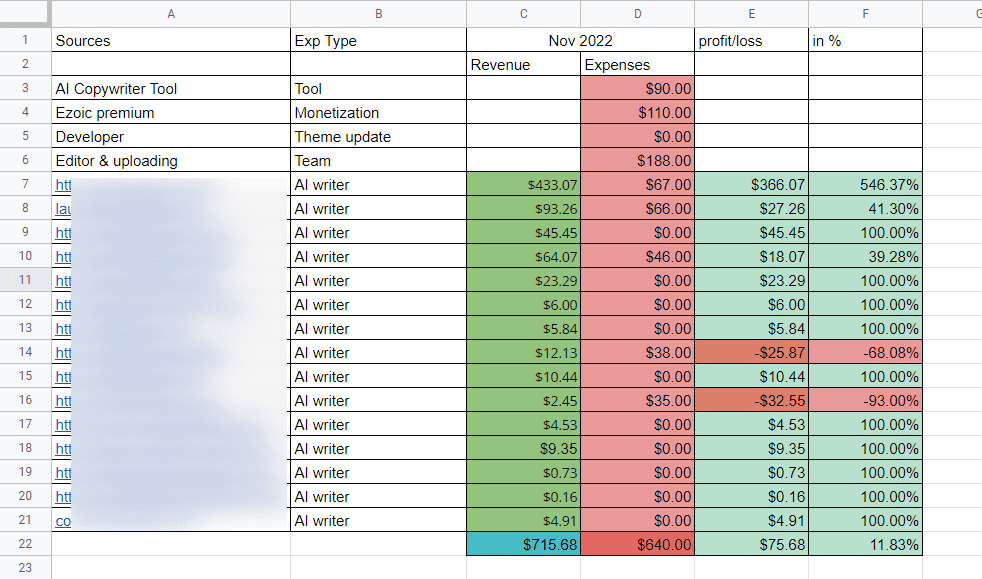
Ezoic offers a highly valuable reporting system that provides detailed insights into your ad performance and revenue. I’m more attracted to using Ezoic for my website portfolio. This can help you make data-driven decisions about how to optimize your ad strategy.
These are kinds of information you must have read on many pages, but not many have discussed Ezoic’s direct ad order feature and how you can use this tool to improve your website revenue.
What is direct ad order?
The Direct Ads feature of Ezoic allows you to integrate any ad orders you have directly sold into Ezoic’s ad testing system. This enables you to negotiate your own deals with advertisers and has their ads displayed on your website directly.
What this means is if your typical EPMV on Ezoic and overall revenue is lower than expected, you can reach out to advertisers or competitors to get a better CPM which is what amount an advertiser pays you for every 1,000 impressions on an ad.
Does direct ad order boost your EPMV and revenue?
The outcome of direct selling will depend on the terms of the deal you have secured. When executed effectively, it has the potential to boost your ad RPM and revenue significantly. But obviously, the primary motivation for choosing direct selling should be to increase revenue.
For example, if your website’s average EPMV is $5 (which only you know) and you find an advertiser who is ready to pay you 8-10 CPM, which will boost the average EPMV record and ad revenue that will be counted as ad mediation on Ezoic dashboard.
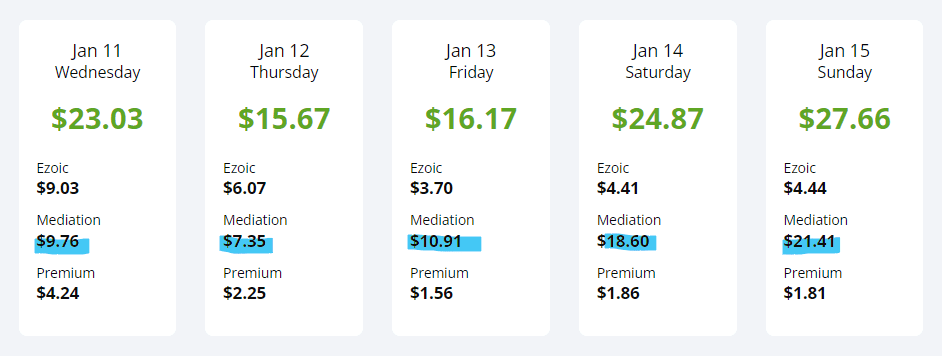
This means you will still be earning your regular revenue with Ezoic (sometimes, with direct ads, the Ezoic ad revenue might lose some impressions) + the additional revenue you have just secured from the advertiser.
Does Ezoic’s payment cover direct ad revenue?
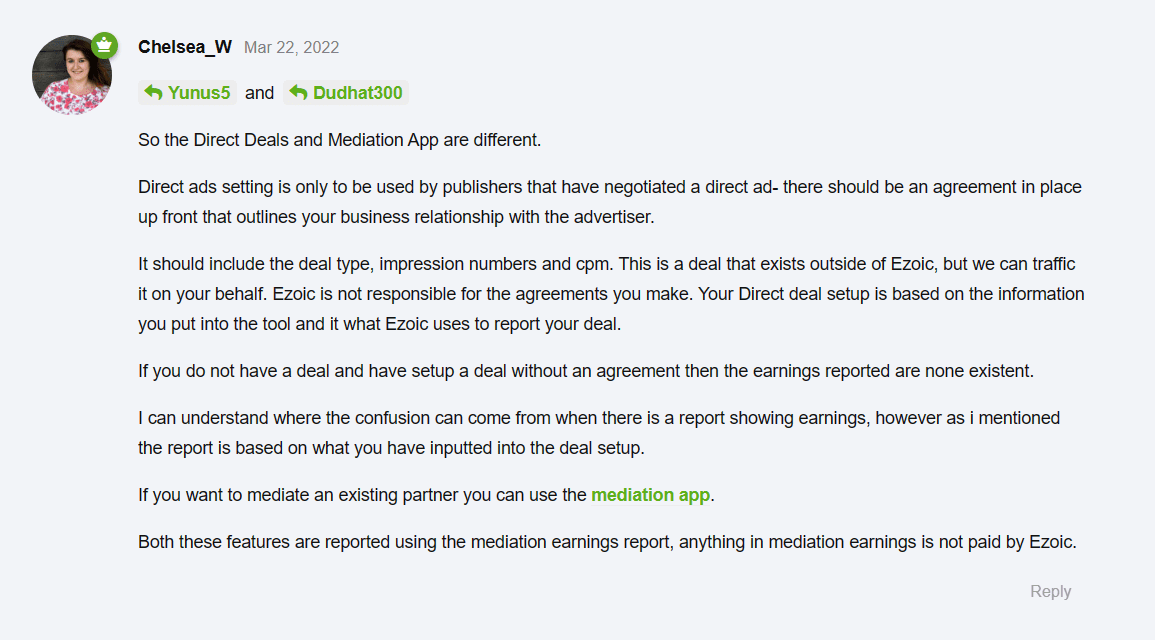
Now not to confuse, Ezoic will just display your ad performance on their dashboard and analytics but will not be responsible for any payment as Ezoic is reporting the information you have imputed on their direct ad order tool. You should receive the payment from the advertiser directly.
Here’s what Ezoic insider has to say about direct ads payment:
How do you prepare to run direct ads on your site?
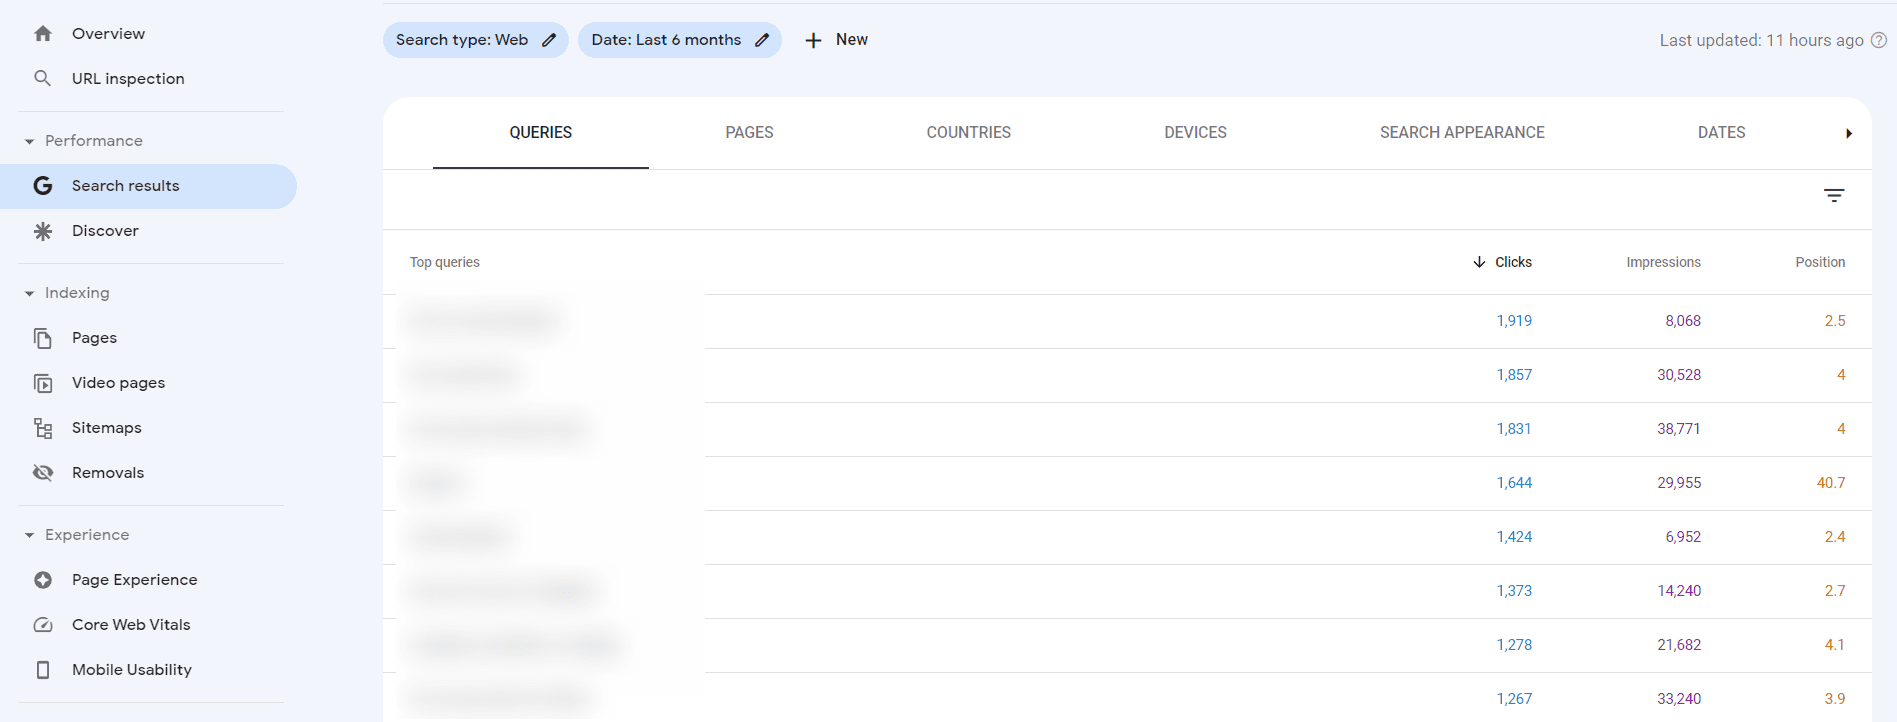
To begin with, it’s essential to know the amount of monthly traffic your website receives. Traffic and impressions are closely linked, and it’s one of the first things an advertiser checks before launching a campaign.
If your website receives more than 50,000 monthly visitors, direct ad sales can be a beneficial revenue stream for you.
Another important factor to consider is the type of content on your website. Certain niches, such as finance and medicine, tend to generate higher ad revenue than others.
It’s essential to identify the niche of your content and research the market to understand what could kind of deal would be beneficial for you.
Securing a direct ad deal requires effort in finding advertisers, communicating with them, and successfully selling a campaign. Once a deal is secured, you will need a system to track ad clicks and impressions.
However, Ezoic’s direct ad tool can simplify this process and save you a lot of time. Here’s what the overview of Ezoic direct order campaigning looks like:
1. Start with a Media Kit
A media kit is a webpage that provides information about your website’s traffic and audience to potential advertisers.
It typically includes data such as the number of monthly visitors, the demographics of your audience, and the types of content on your website. By presenting this information using numbers and percentages, it gives advertisers an idea of the potential reach of your website.
In order to make it effective, it is important to keep your media kit publicly accessible, make it visually presentable, and ensure that all the information is accurate and factual.
This can help potential advertisers understand the value of advertising on your website and decide whether to advertise with you.
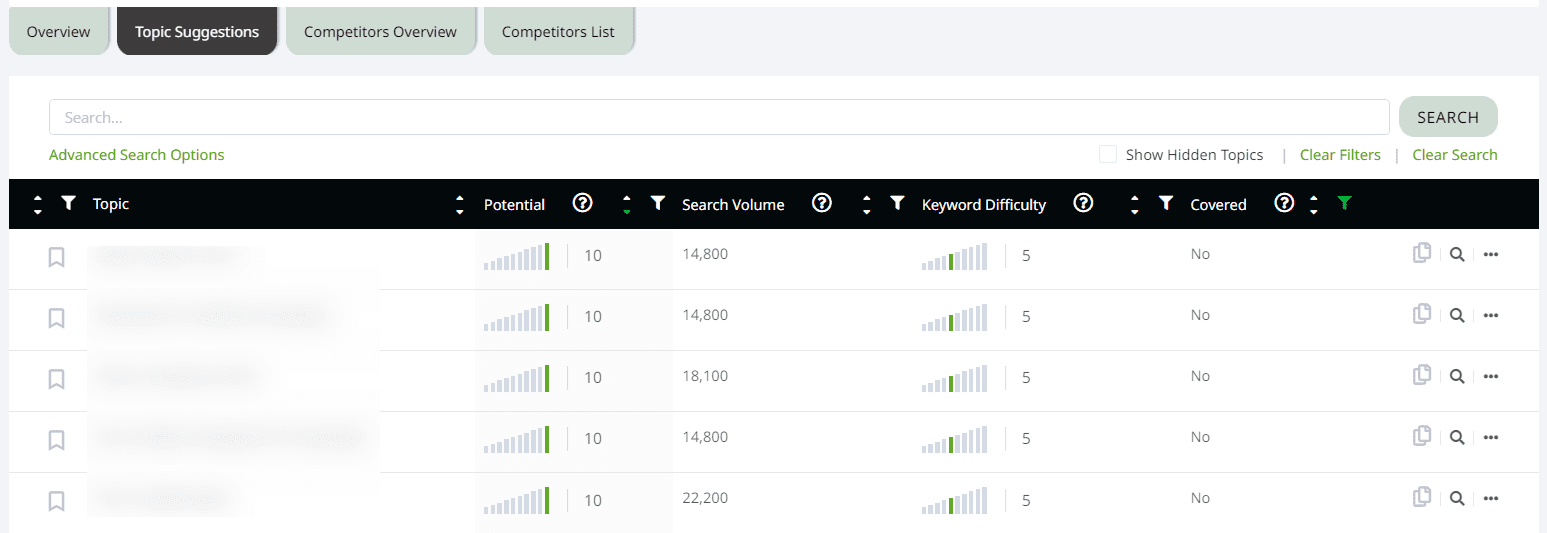
You can customize your media kit in your own way, but the goal is to represent the most important data advertisers are looking for: this one could be a good example –
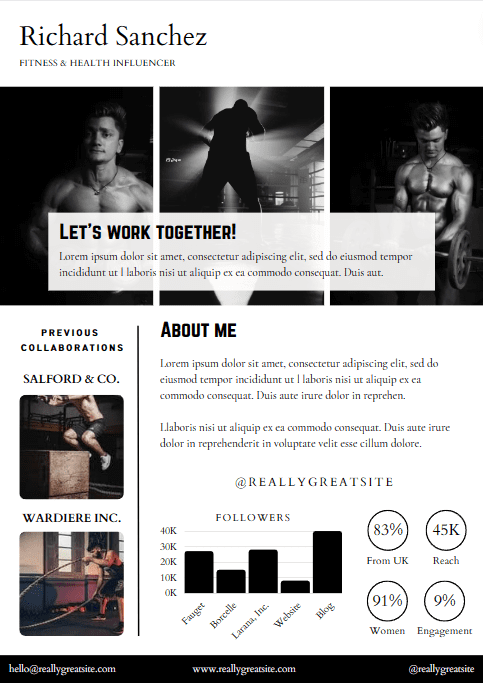
2. You will also need a rate card
The rate card represents the price you have set for all the ad placements available on your site has to offer.
For an advertiser to be able to consider your ad inventory, the rate card will help them to align their budget with your expectation. You can consider selling high-viewability ad positions like your sticky sidebars and footer ads, or you can sell all ad placements with distinct ad rates.
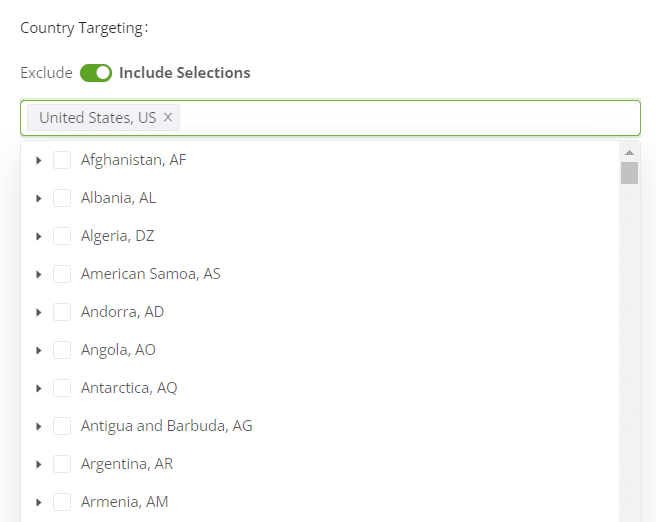
A clean and straightforward rate list makes things easier for advertisers. You can add demographic price rates too because Ezoic direct ad order tool will let you select particular countries if needed.
3. Wrap your requirements with a spec sheet & and a payment solution
Usually, you are more than fine without ad spec requirements (such as ad type, sizes, and performance in terms of loading speed) for the advertisers. Being precise with these will help you run the ad campaign more smoother than without.
You can also add any specific requirements for third-party ad tags, flash or rich media, and more.
When you have completed your ad order kit, the next step is to secure a dependable payment solution.
How to find advertisers?
Once you’ve crafted a compelling traffic presentation and ad requirements guidelines to make your website an attractive destination for advertisers, the question remains, how do you connect with them and vice versa?
There are multiple ways you can look into finding opportunities for direct ad orders:
- One good way to start with is to go direct; you will need to identify advertisers who are already bidding on your inventory and would be a suitable match for your direct campaign. Once you’ve compiled a list, reach out to them and present your pitch.
- Another way is to outsource media sales. If you lack the resources for outreach but have the financial means, consider utilizing services that can provide leads for direct ad sales, such as Winmo, MediaRadar, AdMall, and more.
- Identifying brands, products, and services that are featured on your or a competitor’s website is another great idea. Then you can contact the advertiser or agency decision-maker directly to discuss promotional opportunities.
- You can also look at Thalamus.co Marketplace, where you can find both current and new campaigns that are put out directly by advertisers or agencies. Be sure to check it regularly.
- Networking and attending industry events can also be a great way to connect with potential advertisers and agencies.
- Research and find out what are the brands, products, and services that are trending in the market and reach out to them as well.
How to set up your direct ads?
Once an advertiser expresses interest in your website and a mutually beneficial revenue agreement is reached, you can begin to establish your direct ad campaign through Ezoic.
To do that:
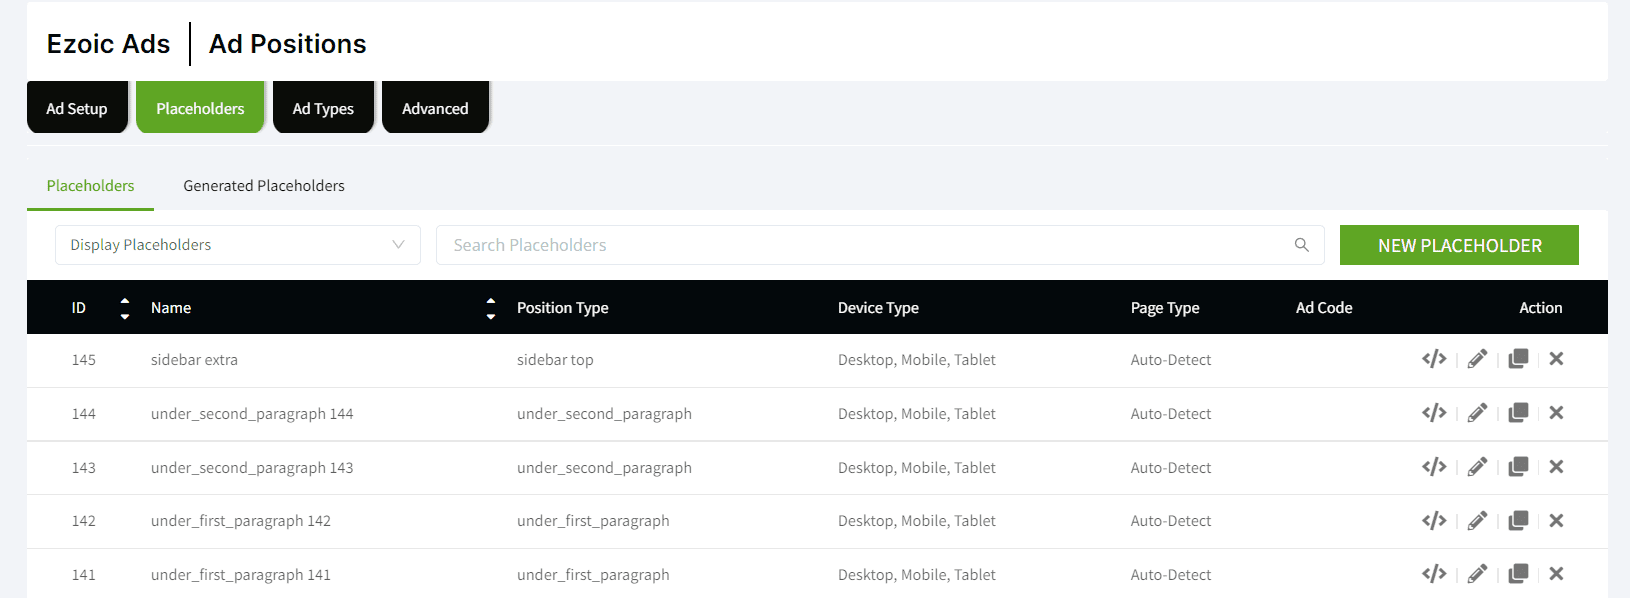
Step 1: On your Ezoic dashboard > click on Ezoic ads.

Step 2: On the left menu, select ad sales > then turn on direct ad orders.
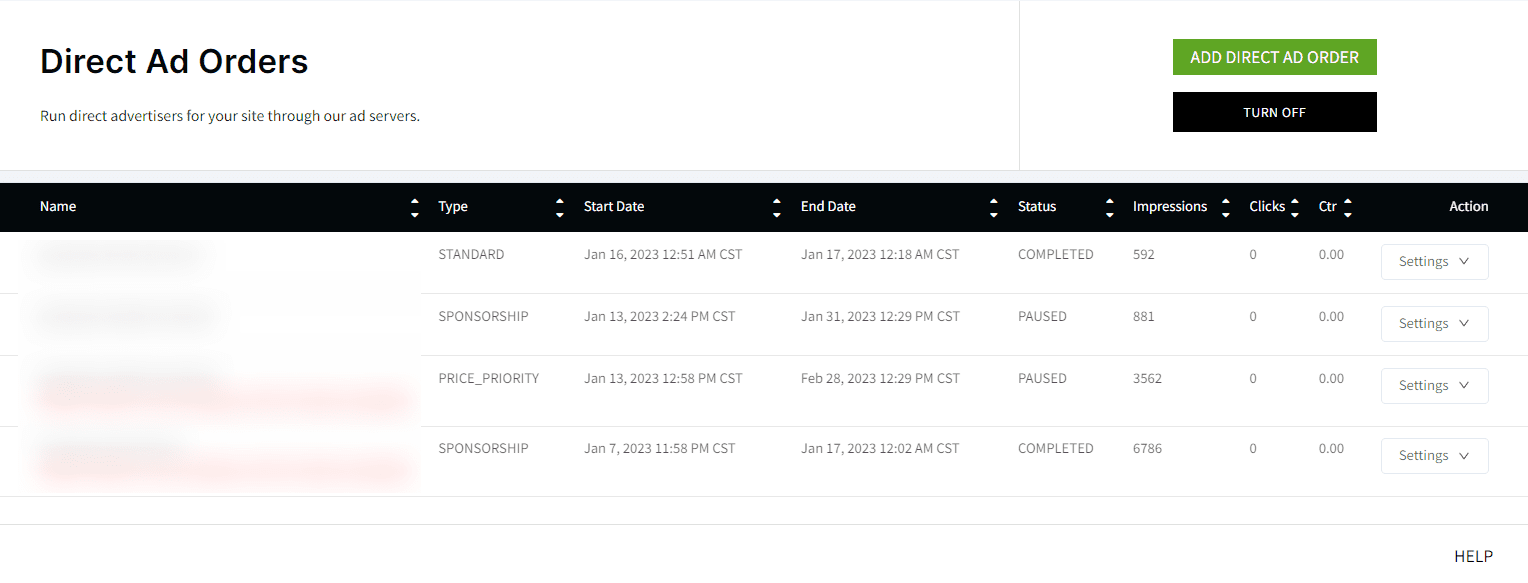
Step 3: After turning on the direct ad order tool, create an ad order by clicking on “add direct ad order”.

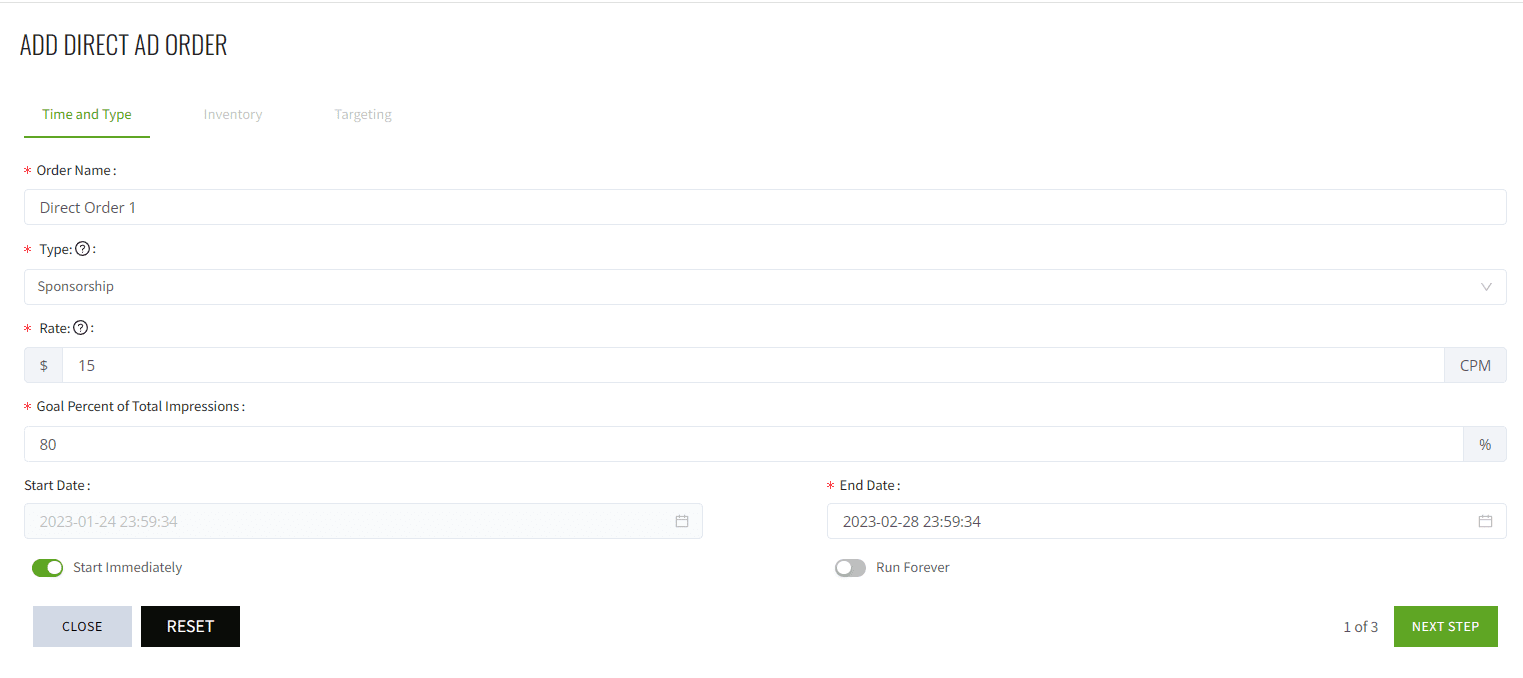
Step 5: Follow the Ezoic guide and complete your order creation process.
Step 6 [important]: Once the order is created, you will need to add ad creatives (basically works like a trigger to link with your existing placeholder to run direct ads) and assign them to the location of your site as agreed.
Step 7: While creating your ad creative, make sure the size and tags are correctly assigned. Once done, save your creative, and your ad order should be marked as ready.
Come back to direct ad orders in the next couple of hours; you should notice the ad status will change to delivering. You will receive the served impressions and click status on those ads and track daily revenue on your Ezoic dashboard. (please note Ezoic only calculate your revenue based on the ad served, you should collect the payment from the advertiser directly)
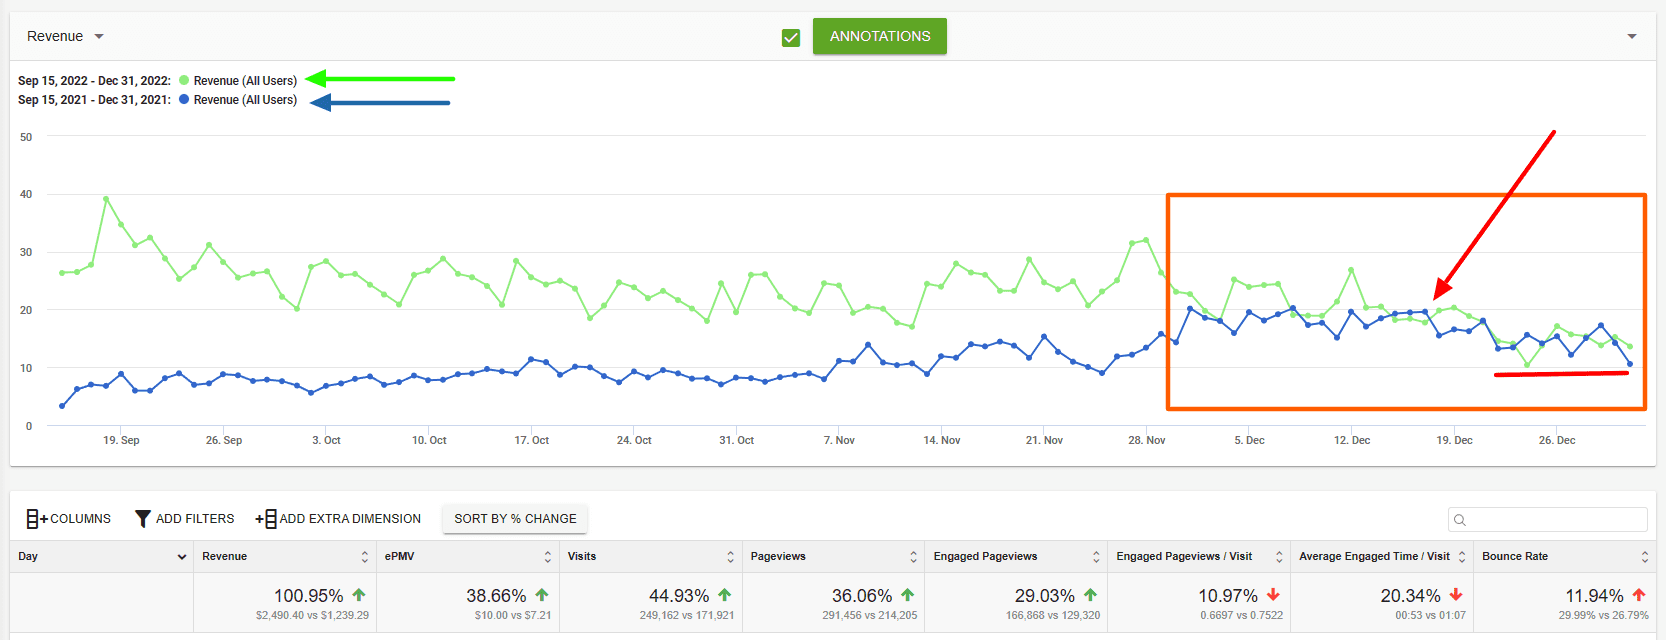
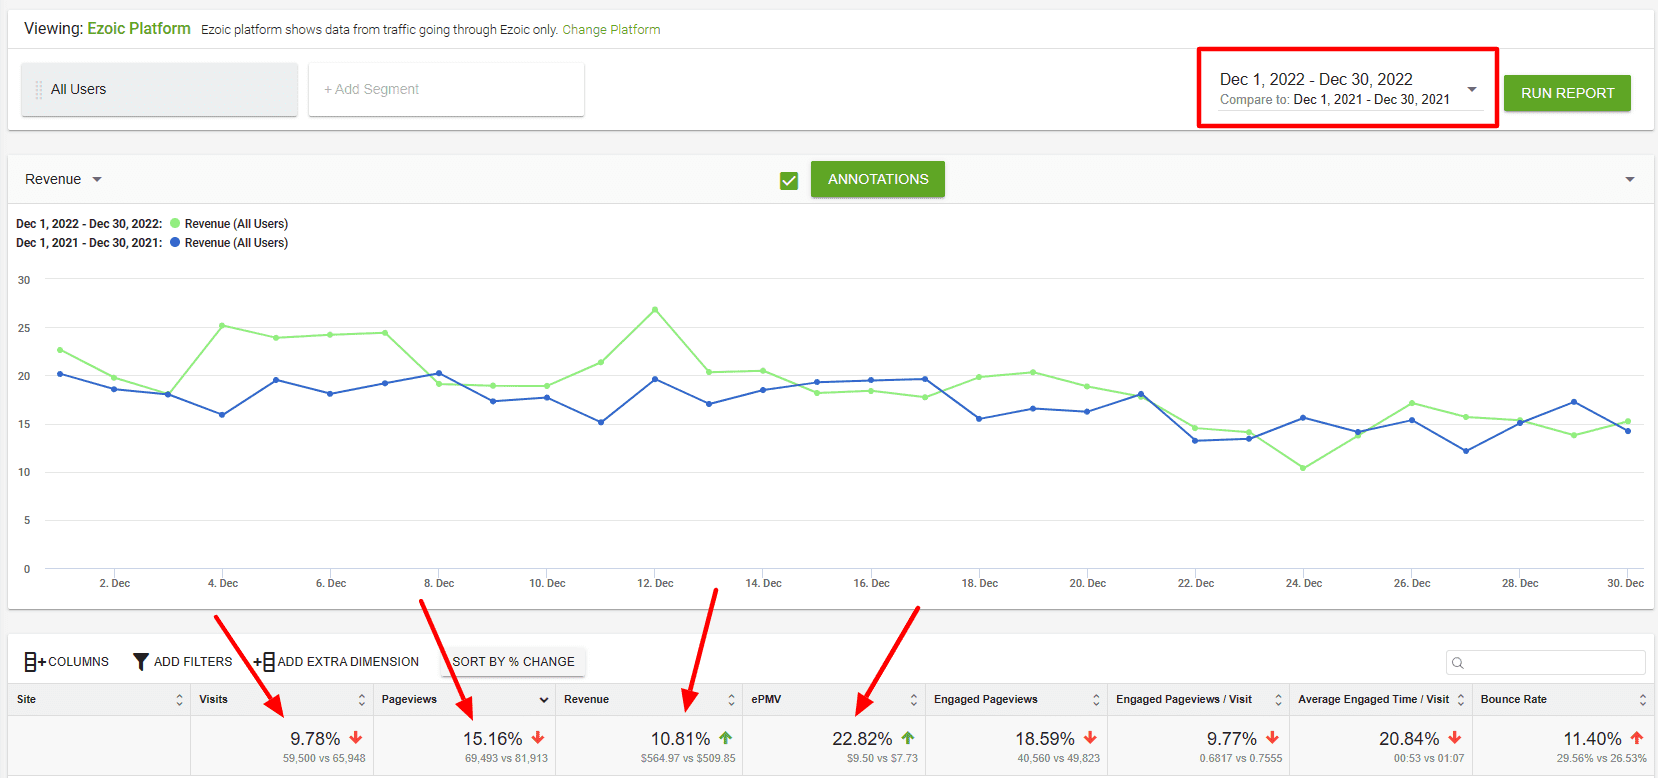
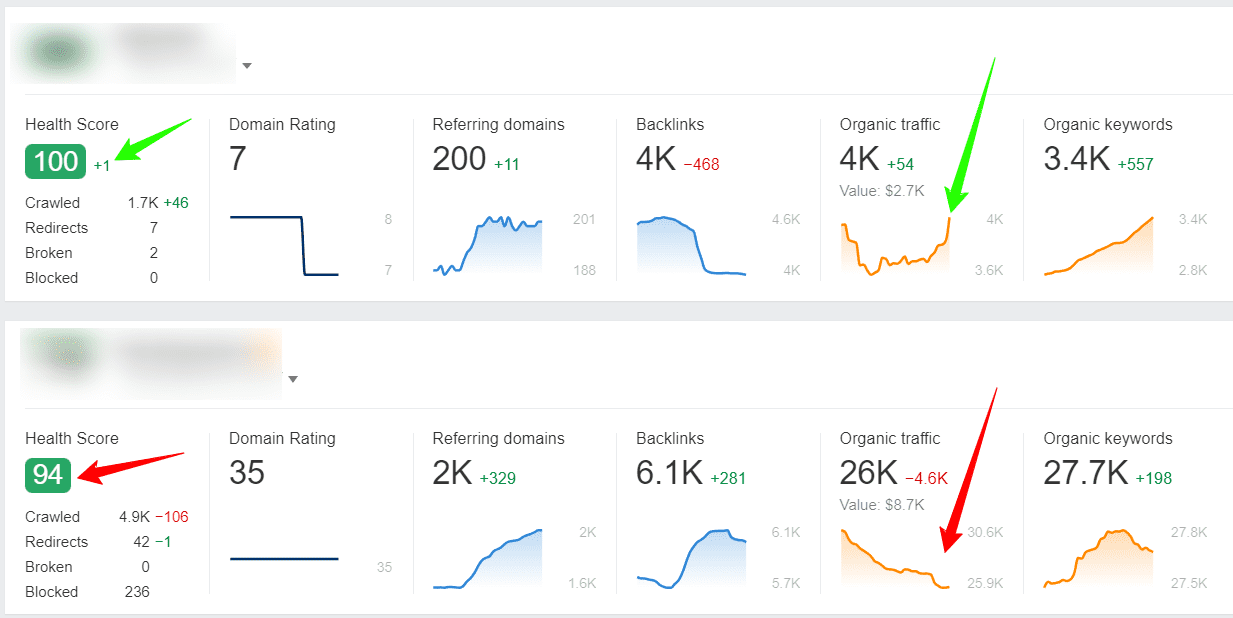
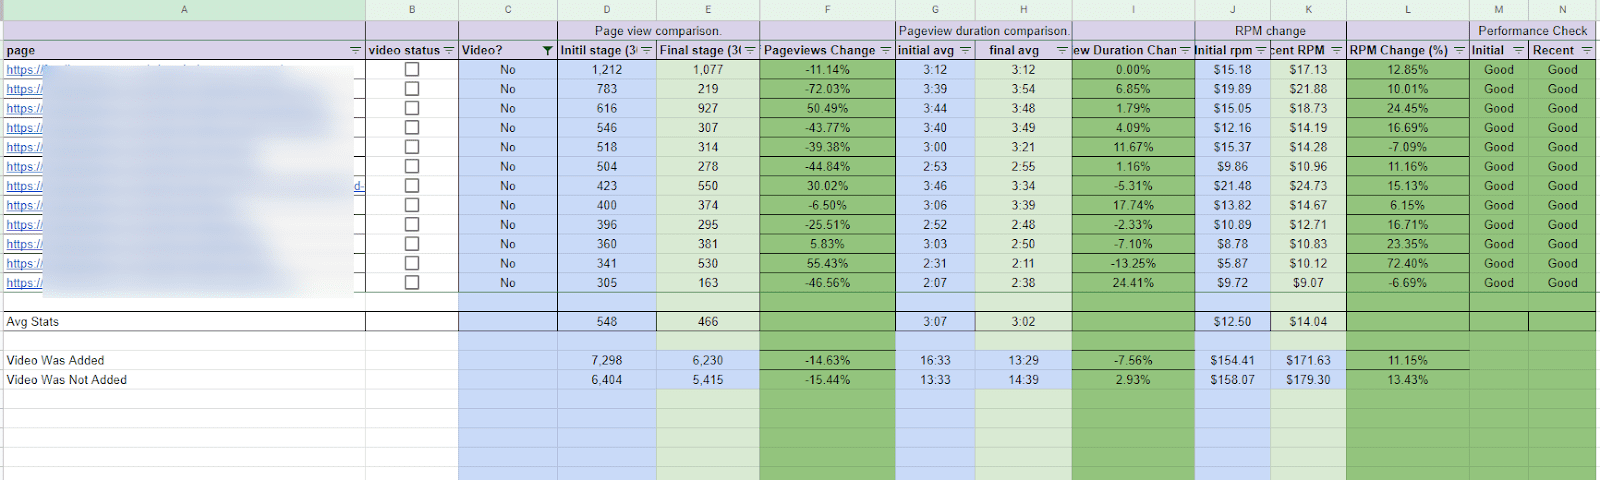
If your direct ad’s CPM is higher than the typical Ezoic ePMV for your site, then you should notice a better overall ePMV on your site, and ad performance can be analyzed on the Ezoic BDA tool.
Summing up:
Running direct ads on your site is not a cakewalk; however, if you approach it the right way, you can make some good money with this monetization strategy. That being said, most website owners still prefer programmatic ads because of their hands-free nature. This article intends that it’s worth going for direct ads only when you have a deal that pays better than your current programmatic ads.
You can run your campaigning, analyze the revenue and RPM in the bigger picture, and then consider the approach that makes you the most money if the effort is worth it.